A brief introduction to the ViCANdo SDK
This is an introductory guide to understanding and working with ViCANdo SDK.
Prerequisites:
- Have a basic understanding of how ViCANdo works.
- Is comfortable to use C/C++ and/or QML & JavaScript as programming languages.
- Is comfortable to use Qt as IDE.
What is ViCANdo SDK?
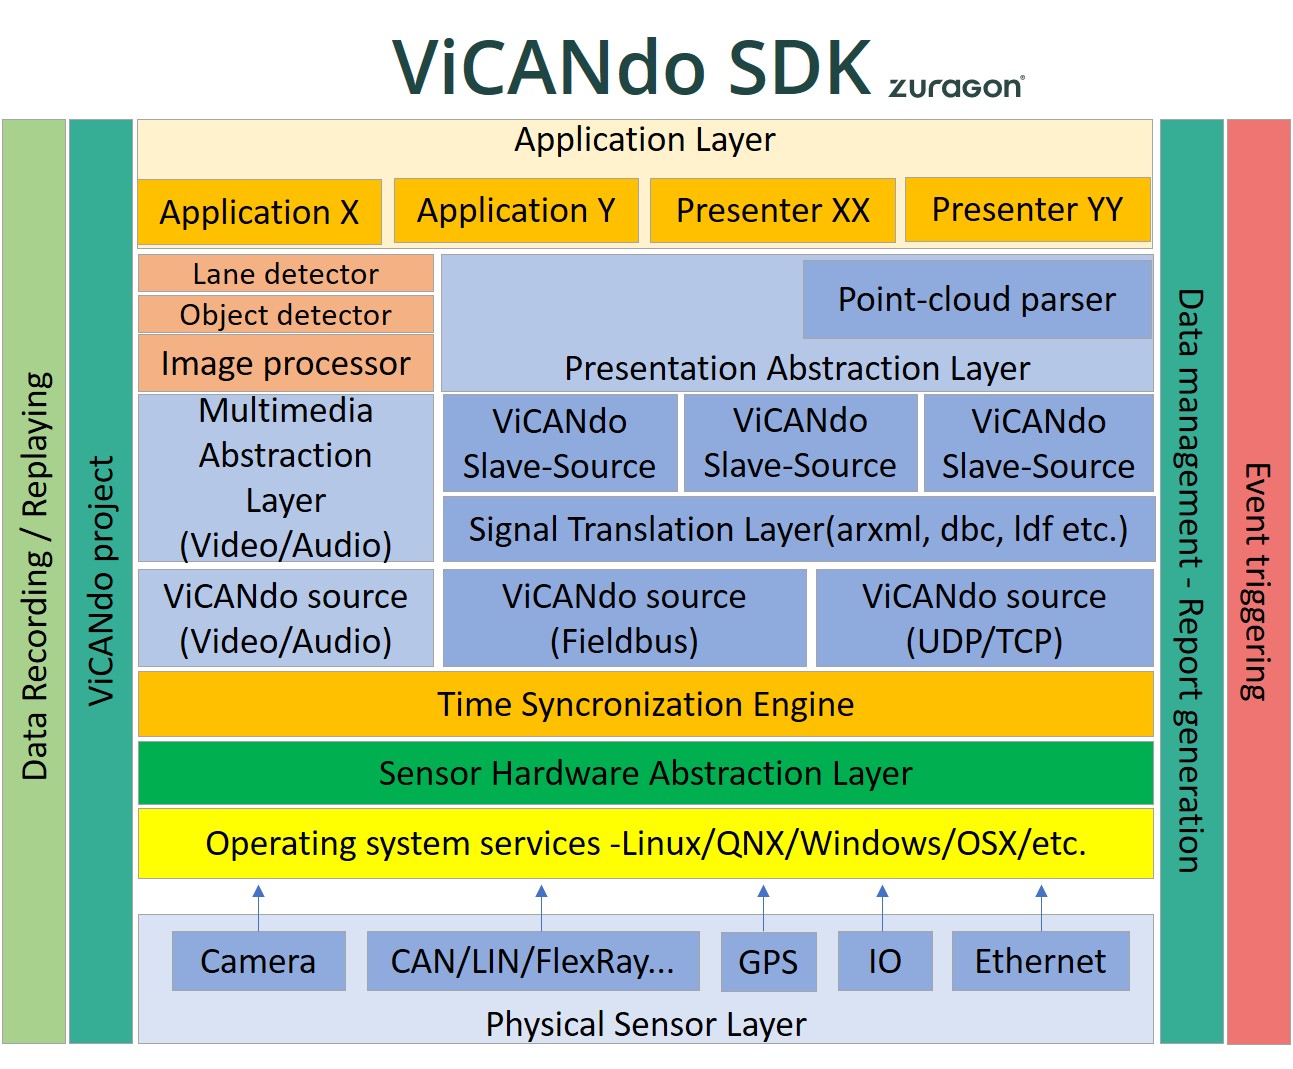
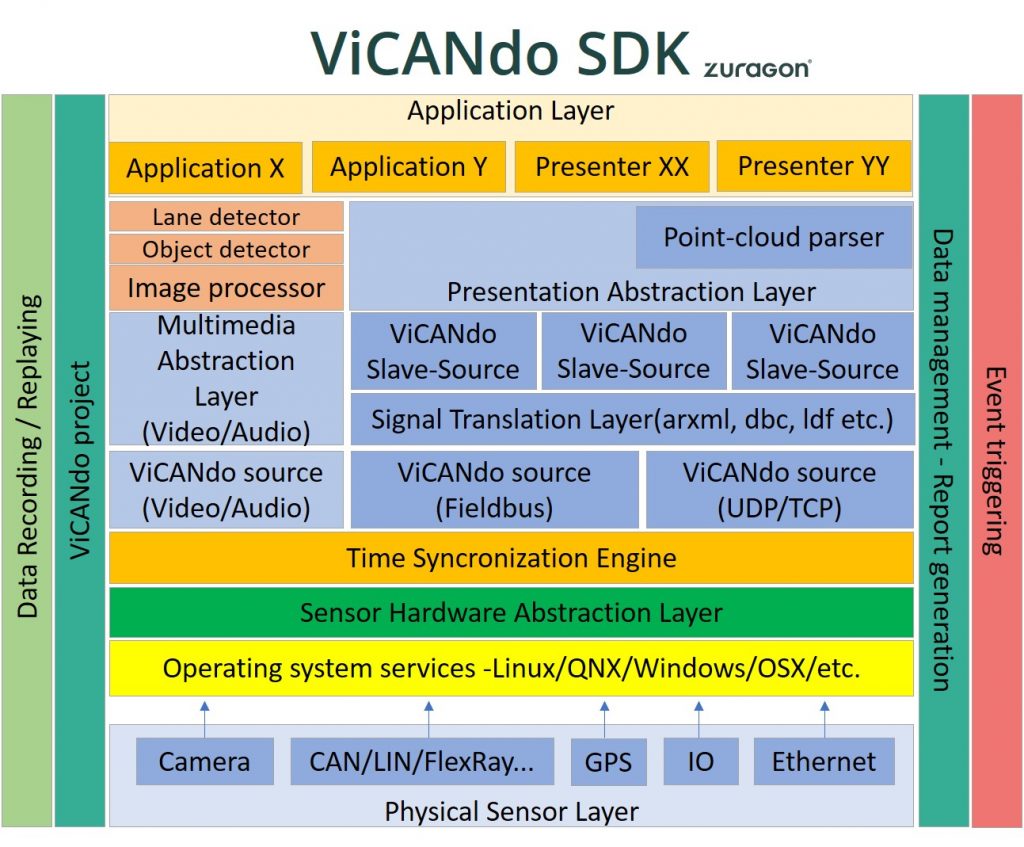
ViCANdo SDK is a development kit for ViCANdo users who need to develop customized applications on top of the ViCANdo platform.
SDK allows you to create customized plugin that can be executed inside ViCANdo or create your own application by using the ViCANdo runtime libraries. Through SDK you get full access to all the data you have acquired. Many of our customers use the SDK to develop their own graphical user interface to present the processed data or control the vehicle based on the sensor fusion results from multiple different sensors, such as radars, lidar and cameras.You can also generate various reports to evaluate the ADAS performance. This article will illustrate a basic UI plugin example that comes with the SDK package(Windows option).
The basic steps to develop a plugin are:
- Setup the development environment
- Develop the plugin
- Release build the plugin
- Load the plugin in ViCANdo and test
Development environment of the example mentioned in this article:
- Windows 10 64-bits OS
- Qt 5.12.x
- MSVC2017 + compiler
- ViCANdo 4.0.51
- ViCANdo-SDK 4.0.51
Note that if you have both Windows and Linux version of SDK, it is possible to reuse your source code with minimum adjustion.
Hello World Presenter example
This example shows you how to exchange data between C/C++ world and QML & JavaScript world.
After unzipping the SDK file, you will find the hello world project under the presenters folder. We recommend that you keep the zipped SDK file saved somewhere as a backup since it’s easier to start developing your own plugin directly inside the SDK as the configuration of the libraries for each project was already configured in the project.
We will show you how to compile the project and generate the example plugin binary and use it in ViCANdo to start with.
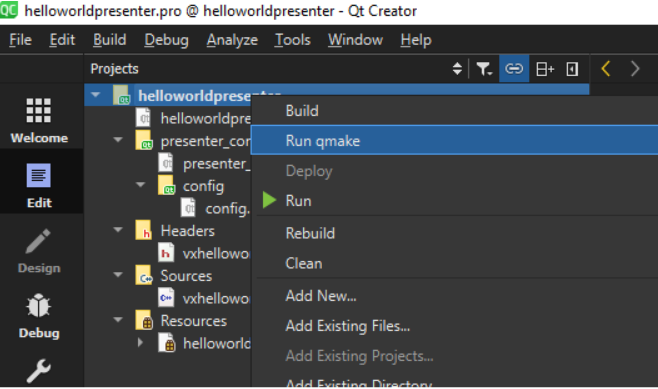
Use Qt Creator to open the project file ( *.pro), right click on the project folder and select “Run qmake” which will generate platform dependent makefiles for all your files needed to compile. Then debug and/or release build to generate the binary files.
Follow the online SDK manual to complete the rest of the process: https://www.zuragon.com/docs/sdkmanual/presenter%20examples.html#helloworld-presenter-example
If you have configured in ViCANdo to load the SDK plugin automatically at start. When you start ViCANdo, you will find the “Hello world viewer” under the “Presentation” menu. Each presenter needs to have a source to work with. You can specify the type of source your presenter will work with in the function “isSourceCompatible”.
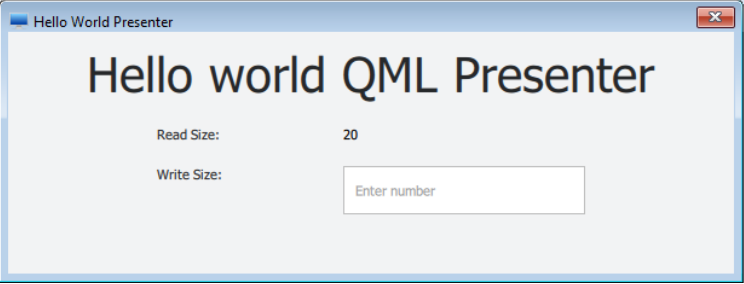
The hello world presenter is configured to be compatible to all kinds of sources. Now let’s create a new project in ViCANdo and just add a CAN source with default virtual channel. Then select the “Hello world viewer” under the “Presentation” menu, and the window below will open.
This is a really simple application that shows you how to exchange data between the C++ side and the QML side. User types in a value from the QML interface, then the corresponding parameter will be passed to the C++ side and the updated value will be displayed on QML interface.
Click on the red “Record” button to start, then write a number(I have typed 15) in the text field and click Enter on keyboard, you will get the value printed above the text field and some debugging text displayed in the console window.
By using the project object from the QML API(read manual here: https://www.zuragon.com/docs/sdkmanual/qml%20api.html#project) you have access to the data from most sources and the properties and methods you can use to processing the data.
Hopefully you will be able to develop your own plugin from now on.
If you need more help, please feel free to contact our support team or our global distributors in your country.


